3D Printed Plates Subjected to Vibration and Impact – Dynamic Mechanical Testing for Additive Manufacturing Components
As an ISO/IEC 17025 accredited (CNAS) independent laboratory, we provide specialized dynamic testing services for 3D printed plates under vibration and impact loading. Additive manufacturing (AM) produces components with unique material anisotropy, internal voids, layer‑interface weaknesses, and residual stresses that significantly affect their response to dynamic loads. Our laboratory evaluates the vibration endurance (fatigue) and impact resistance of 3D printed plates produced by various technologies including fused deposition modeling (FDM), stereolithography (SLA), selective laser sintering (SLS), selective laser melting (SLM), and binder jetting. We serve the aerospace, automotive, medical device, defense, and consumer goods sectors in Algeria, helping manufacturers validate printed components for real‑world dynamic environments.
Types of 3D Printed Plate Samples We Test
- FDM‑printed plates (material: PLA, ABS, PETG, PC, Nylon, TPU, carbon‑fiber reinforced PLA)
- SLA/DLP‑printed plates (photopolymer resins – standard, tough, flexible, high‑temperature, castable)
- SLS‑printed plates (nylon PA12, glass‑filled nylon, polypropylene, TPU)
- SLM/DMLS‑printed plates (metals: aluminum AlSi10Mg, titanium Ti6Al4V, stainless steel 316L and 17‑4PH, Inconel 718, cobalt chrome)
- Binder jetting plates (stainless steel, bronze, sand molds)
- Multi‑material and composite 3D printed plates (continuous carbon fiber reinforced filaments, dual‑extrusion combinations)
- Lattice‑structured and topology‑optimized plates (gyroid, diamond, honeycomb, auxetic patterns)
- Plates with different printing orientations (flat (XY), edge (XZ), upright (YZ), and angled)
- Plates with variable infill densities (10%, 30%, 50%, 100%) and infill patterns (grid, triangular, cubic, honeycomb, concentric)
- Post‑processed plates (annealed, UV cured, chemically smoothed, machined, coated)
Vibration Testing Methods for 3D Printed Plates
Vibration tests simulate the oscillatory dynamic loads encountered by components during transportation, operation, or adjacent machinery operation. Our laboratory performs both sinusoidal and random vibration tests.
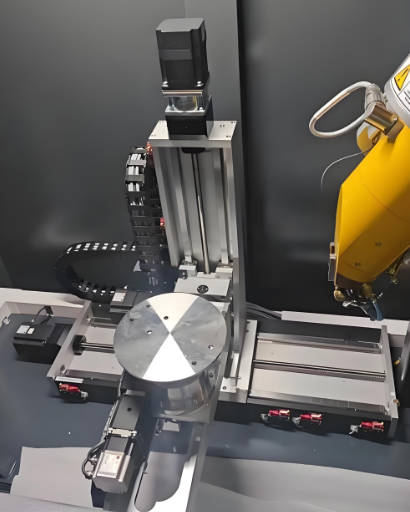
- Test setup and fixturing – The 3D printed plate is mounted onto a vibration shaker using a rigid fixture that matches the intended mounting condition (fully clamped on edges, clamped on two edges, or simply supported). Care is taken to ensure that the fixture’s natural frequencies are at least three times higher than the maximum test frequency to avoid extraneous resonances.
- Modal analysis (experimental modal testing – EMA) – Before durability testing, we perform modal analysis to identify the natural frequencies (resonances) and mode shapes of the plate. A small accelerometer (mass < 2 g) is attached to the plate, and a broadband random excitation or a swept sine input is applied. The frequency response function (FRF) is calculated. For 3D printed plates, the first bending mode and first torsional mode are typically the most critical. Results are presented as a table of natural frequencies (Hz) and damping ratios (%). This information is essential for avoiding resonance in service and for selecting test frequencies.
- Sinusoidal sweep vibration test – The plate is subjected to a sinusoidal excitation whose frequency increases (or decreases) logarithmically across a specified range (e.g., 5–200 Hz) at a constant acceleration amplitude (e.g., 1 g, 2 g, 5 g). The sweep rate is typically 1 octave per minute. The test may include dwell periods at identified resonances to accelerate fatigue damage. Acceptance criteria: no visible cracks, no resonant frequency shift exceeding 5%, and no through‑thickness fractures.
- Random vibration test (more representative of real‑world environments) – A random vibration power spectral density (PSD) profile is applied. Typical profiles: transportation vibration (0.005–0.05 g²/Hz from 5–200 Hz), automotive suspension vibration (0.01–0.1 g²/Hz from 5–200 Hz), or aerospace random spectra (0.01–0.5 g²/Hz from 20–2000 Hz). The test duration ranges from 30 minutes to 8 hours per axis. The root mean square (RMS) acceleration is calculated. We monitor the plate’s response via an accelerometer and control the shaker using a closed‑loop controller. Failure is defined as through‑cracking, delamination (for FDM layers), or measured natural frequency drop > 20% from initial.
- Resonance search and dwell test – After identifying the primary resonances, the plate is vibrated at a specific resonant frequency for an extended period (e.g., 1 million cycles or 10 hours). This test is highly aggressive and reveals hidden weaknesses at layer interfaces or near infill boundaries. For FDM plates, resonance dwell often initiates crack propagation along interlayer bonds.
- High‑cycle vibration fatigue (endurance) – For components intended for long service life (e.g., drone frames, automotive brackets), we run random vibration tests for up to 100 hours (equivalent to thousands of kilometers of transportation). The S‑N curve (stress vs. number of cycles) can be derived by testing multiple identical plates at different vibration levels.
Impact Testing Methods for 3D Printed Plates
Impact tests simulate accidental drops, tool strikes, hail, or debris impacts. The anisotropic nature of 3D printed parts makes them particularly vulnerable to impact loads applied perpendicular to the layer direction.
- Instrumented drop‑weight impact test (falling dart method) – A guided weight (5–50 kg) with an interchangeable hemispherical, flat, or conical tup is dropped from a controlled height onto the center or designated impact point of the plate. The drop height determines the impact energy (E = mgh). The instrumented tup contains a piezoelectric load cell (sampling rate > 20 kHz) to record force‑time history. A high‑speed camera (5000–50,000 fps) captures the deformation sequence. Output parameters: peak force (N), impact energy at peak force (J), total absorbed energy (J), deflection at peak force (mm), and time to failure (ms). The failure mode (ductile indentation, brittle fracture, layer delamination, perforation) is recorded.
- Charpy and Izod impact tests (for standard specimens machined from 3D printed plates) – When the plate is large enough, we machine standard impact test specimens (e.g., 80 mm × 10 mm × 4 mm for Charpy unnotched) from the plate in different orientations (parallel to layers vs. perpendicular to layers). The pendulum impact tester (energy 1–50 J) strikes the specimen, and the absorbed energy (J) is recorded. Comparing orientation‑specific results quantifies anisotropy. For FDM plates, impact strength perpendicular to layers is often 50–70% lower than parallel to layers.
- Falling ball impact test (for smaller or thin plates) – A steel ball (diameter 25–60 mm) is dropped from a height onto the plate. The ball may be guided by a tube. The critical drop height at which visible damage (crack, dent, backside bulging) occurs is recorded. This test is simple and reproducible, suitable for comparative studies of different print parameters.
- Pendulum (Charpy‑type) impact on plate edge (for edge‑on impact) – Some applications require edge impact resistance (e.g., plates sliding into slots). The plate is clamped at one end, and a pendulum striker hits the free edge. The absorbed energy and deformation are recorded. Failure often initiates at corners or at layer interfaces.
- Sequential impact (multiple hits at same or different locations) – After the first impact, the plate is impacted again (same energy or increasing energy) to assess damage tolerance. This simulates real‑world scenarios where a component may suffer repeated minor impacts.
- Environmental conditioning before impact – Plates are conditioned at low temperature (-40°C, -20°C), high temperature (50°C, 80°C), or after humidity exposure (e.g., 50°C / 95% RH for 48 hours) to evaluate the effect of service environment on impact resistance. FDM‑printed PLA becomes brittle at low temperatures; nylon becomes tougher at higher humidity.
Combined Vibration‑Then‑Impact and Impact‑Then‑Vibration Tests
Real components often experience both vibration and impact sequentially. Our laboratory offers two combined sequences.
- Vibration‑then‑impact – The plate first undergoes a random vibration test (e.g., 2 hours, 1 g RMS). Immediately afterward, the same plate is subjected to a drop‑weight impact test. This sequence simulates a component that has been in service (vibration aging) and then suffers an accidental drop. The remaining impact strength (post‑vibration) is compared to the impact strength of a fresh (unvibrated) plate. Any reduction indicates vibration‑induced fatigue damage.
- Impact‑then‑vibration – The plate is first impacted at a sub‑critical energy (e.g., 70% of the perforation energy) to create a non‑visible or barely visible damage (indentation, microcracks). Then it is subjected to random vibration. We monitor for crack propagation, delamination growth, or catastrophic failure during vibration. This sequence simulates a component that has been dropped (perhaps unnoticed) and then continues to operate in a vibrating environment.
Key Parameters Influencing Results – What We Control and Record
Because 3D printed plates vary widely depending on print parameters, we systematically document all relevant manufacturing details to allow accurate interpretation and correlation.
- Print parameters – Technology (FDM, SLA, SLS, SLM), layer height (µm), nozzle size (for FDM), laser power and scan speed (for SLS/SLM), build orientation (X, Y, Z, or angle), infill density (%) and pattern (grid, honeycomb, gyroid, lines), number of perimeters / shells, top/bottom layer thickness, extrusion width, print temperature, bed temperature, cooling settings, and support structure.
- Material specifications – Resin or filament brand, batch number, nominal mechanical properties (tensile, flexural, impact from manufacturer), color, and any post‑processing (annealing, UV curing, sanding, coating).
- Plate geometry – Length (mm), width (mm), thickness (mm), edge finish (as‑printed vs. machined), presence of holes, cutouts, or notches.
- Environmental conditions during testing – Temperature (°C) and relative humidity (%) in the test chamber. Plastics are sensitive to both; metals are less sensitive but still influenced by temperature.
Failure Analysis After Vibration and Impact Testing
Understanding why a 3D printed plate failed is as important as knowing the failure load. Our post‑test analysis includes:
- Visual and stereomicroscopic examination (magnification 5×–80×) – Crack paths (along layer lines vs. across layers), delamination areas, crushing at impact point, and backside bulging. For FDM plates, we note whether failure occurred at the interface between adjacent layers (weakest) or through the filament itself.
- Scanning electron microscopy (SEM) of fracture surfaces – For high‑magnification analysis (100×–10,000×), we examine the fracture surface for signs of ductile tearing (microvoid coalescence) vs. brittle cleavage. For FDM‑printed parts, we observe incomplete fusion between filaments (lack of fusion voids) and the extent of neck growth between layers. For SLS/SLM parts, we examine porosity and lack of melt pools.
- Cross‑sectioning of impacted area – The plate is cut at the impact site, mounted in resin, polished, and examined by optical microscopy. We measure the depth of indentation, the extent of internal microcracking below the surface, and any delamination between layers. For lattice plates, we assess strut fracture patterns.
- Comparison with as‑printed (unexposed) reference plate – A control sample from the same print batch is tested without any vibration or impact to establish baseline properties. Any deviation (resonance frequency shift, loss of stiffness, reduction in impact strength) is attributed to the dynamic loading.
- Thermographic or dye penetrant inspection for crack detection – For metal 3D printed plates, we use liquid dye penetrant to reveal microcracks that are not visible to the naked eye. For plastic plates, we may use UV dye under black light.
Reporting and Deliverables
Each test report for 3D printed plates subjected to vibration and impact includes the following information:
- Complete sample description: print technology, material, layer height, infill pattern/density, build orientation, post‑processing, plate dimensions, and any other client‑provided manufacturing parameters.
- Vibration test conditions: test type (sinusoidal sweep, random, resonance dwell), frequency range (Hz), acceleration levels (g or m/s²), PSD profile (for random), test duration per axis, number of axes tested, control accelerometer location, and actual measured response (if monitored).
- Modal analysis results: natural frequencies (Hz) and damping ratios (%) of the first 3–5 modes, with mode shape descriptions (bending, twisting, plate mode).
- Impact test conditions: impact energy (J), drop height (m), tup mass (kg), tip geometry (hemispherical, flat, conical), support condition of plate (fully clamped, simply supported, free), number of impacts, and temperature/humidity during test.
- Quantitative results: peak force (N), absorbed energy (J), deflection (mm), time to peak (ms), velocity before impact (m/s), rebound velocity (if measured).
- Failure description: photographs and microscope images of cracks, delamination, indentation depth, and fracture surfaces. For vibration tests, we report the number of cycles survived or the time to first detectable resonance shift.
- Comparison with client‑supplied acceptance criteria (if provided).
- Raw data files (force‑time curves, acceleration‑time histories, high‑speed video files) are archived and available upon request.
No statement of compliance with any external standard or regulation is made unless the client has provided specific acceptance criteria in writing. All raw data, print logs, and calibration records are stored for a minimum of 10 years.
Why Choose ZKGX?
- State-of-the-art analytical equipment
- Highly qualified scientific team
- Fast turnaround time
- Competitive pricing